3 Pack Reviews from the Pacific Crest Trail
*Disclosure: I only recommend products I would use myself and all opinions expressed here are my own. Please note that this page contains affiliate links. As an affiliate I earn a small commission on purchases made through these links, at no additional cost to you. Purchases made through these links help to grow this website. Thank you for your support!
The backpack – this essential piece of gear should not be chosen lightly. The functionality, durability, and comfort of a pack are key factors in pack selection.
It is important to know what features you value in a pack, which can be challenging if you have never done a thru-hike before- but not to worry!
Gear reviews are everywhere and as long as you have a pack that fits what you need and doesn’t hurt, then you can make it from Mexico to Canada (or whatever distance you choose!)!
I used 3 different backpacks along the Pacific Crest Trail, which include: (1) Gregory Sage 45 L, (2) Gregory Zulu 40 L, and (3) ULA Circuit 68 L pack.
If you’re asking what features you should seek out on your pack, you’re in the right place. Here is a great post to gain some insight into the practicalities of pack features, and the associated pros and cons.
I will discuss these packs in the context of the Pacific Crest Trail and provide some stats related to pack use from my trek. However, many of these points will still be transferable to other trails.
Let’s get started!
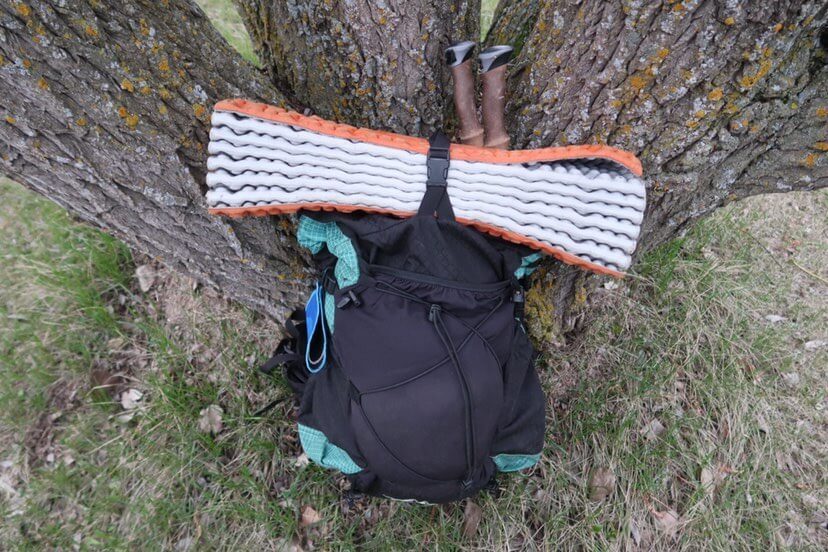
1. Gregory Sage 45 L Pack
Stats
- # of miles used: 1773.2
- Weight: 3.13 lb
- Size: 45 L
- Price at purchase: information unavailable, as I purchased it 7 years ago, no longer have the receipt, and it is no longer available for purchase at retailers or online.
You may already be asking “WHY is she talking about a pack that is no longer available – that doesn’t help me.” Here’s the thing, it absolutely will help in decision-making
The Gregory Sage 45 L pack was absolutely incredible and the wonderful features it had are absolutely worth discussing.
Pros
First of all, the pack had a 7-year lifespan. That is astounding, given how much abuse I put it through.
It was a dream on the trail, and only truly realized how much I loved it after it was retired. The pack fit well, and never irritated my body (even after 14-hour days of hiking and sweating!).
It was small, but managed to contain every item I needed, even in the Sierra (when it was filled to its capacity).
I could go on for a very long time about why this pack was fantastic, but that seems useless as they are no longer produced or available for purchase. So, I will summarize the 5 most functional and important features of this pack:
(1) The pouch for your water reservoir was not located in the main cavity
Having a water reservoir accessible from outside the main compartment does not seem to be a very common trend. However, the benefits are incredible!
During rainy days, this feature becomes most valuable. You can fill your reservoir without opening the main compartment. Thus, reducing direct exposure of your gear.
Not only that, but rainy days tend to be chilly. The longer it takes to get your bladder and fill it, the longer you are standing there shivering.
A garbage bag lining is important for rain protection, as well. However, eliminating the exposure is a more effective hazard control than the use of personal protective equipment (as specified in the Hierarchy of Controls by the National Institute for Occupational Safety and Health – you can learn more on their website here).
(2) Straps that allow you to attach gear under your pack
It’s so convenient to carry a foam sleeping pad on the underside of your pack (or other items, I’m sure). The feature allows for quick access to your pad for use, but does not require removal and remounting to enter the main cavity (as it would with straps located on the top of your pack).
(3) Material durability
This was amazing. The pack was dual-purposed for backpacking treks and rockclimbing, so it was built tough to prevent rips from rock contact and more.
(4) Hidden security pouch
A GAME CHANGER! Finding a place for important papers, your wallet, ID, etc. is SO CHALLENGING. I don’t know why, but it is.
You don’t need these items regularly, so keeping them in an outer pouch just increases the risk that you lose them on trail. However, keeping them in the depths of your pack is frustrating and requires a bit of forethought (or a lot of digging) when you need these items in town.
Having a zippered accessible, HIDDEN, pouch was invaluable. Such a simple thing, but I really appreciated it. Knowing those important items were tucked away safely, but still easily accessible, was so convenient (and stress-relieving!).
(5) Ice axe loops that held the tool upright and secure
This point is really only valuable to those who want to hike in elevated areas with snow and ice cover.
The Sage pack had strong Velcro loops, which could be used to hold the shaft of your ice axe to the side of your pack.
Having a secure, out-of-the-way, but still easily accessible location for an ice axe was great for the Sierra.
Considering where your ice axe will go should be something you consider when looking for a long-term diverse pack.
Cons
(1) It was not ultralight
While the weight of the pack is more than you might desire for thru-hiking, I had no problem with it. The stability and comfort that came as a result of additional weight, such as frame weight, were well worth it.
If you are looking for an ultra-light pack, this wouldn’t be a good choice.
(2) Stiff side pouches
The side pockets were also made of durable material, which is great for protection…. but not so great for inserting and removing a water bottle while walking. If you use water bottles instead of a bladder, you may want to seek out stretchy side pockets.
You may be asking: “If the Gregory Sage is soooo great, why didn’t you use it for the entire trail?“
Excellent question.
My Sage pack was used from Mile 0 to Fish Lake Resort (~mile 1773.2), although it had snapped 26.5 miles prior to reaching this destination.
When the pack broke, I hitched to town for a new pack. This is when I purchased a Gregory Zulu 40 L pack.
That is the only reason I changed my pack.
*Side note: In retrospect, I should have mailed my Sage pack home, but because this was the only backpacking pack I had ever had, I assumed that packs were created fairly equal to one another….. but that was not the case.
2. Gregory Zulu 40 L Pack
Stats
- # of miles used: 179.4
- Weight: 2.93 lbs
- Size: 40 L
- Price at purchase: $179.95 USD
The size of the pack was perfect; at least, for Oregon.
In Oregon, there is no need to carry the amount of equipment that is required in the Sierra. A smaller pack is lighter and helps to cut down your base weight.
The Zulu is only 5 L smaller than the Sage, but it’s capacity felt a lot smaller. There were significantly less exterior attachment sites for your gear. You truly had to fit your items inside if you wanted to take them with you.
Pros
(1) Stretchy side pockets
As mentioned above, stretchy side pockets are great for getting water bottles in and out while walking.
(2) Large elastic front pouch
The large elastic front pouch is great for carrying things that you need, but don’t mind stopping in order to reach.
*Side note: My favourite part of the front pouch is that I can stuff my days worth of food into it, so I have an idea about how much and what types of food I eat each day. It really helps when heading to restock at the grocery stores. (This is actually a time where I calorie count).
Snacks, camera gear, a rain jacket, or anything else you need throughout the day (as opposed to what you need in camp), is best stuffed in the front pouch. The bigger, the better in this case!
(3) Trampoline-style frame design
The trampoline-style design of the Zulu allows for better airflow along your back.
*I must admit that personally, I didn’t notice a significant difference.
(4) Cushioned shoulder straps
Oh my god. The shoulder straps were actually so comfortable.
They had a lot of cushion, and it was actually noticeable. It was not one of those things that you only know is there because the specs tell you so.
Cons
(1) Zippered brain pouch
The brain is the top flap of the pack that covers access to the main compartment (it is not present in all pack designs).
The zipper opened in a way that made it more difficult to zip up when full.
I had also grown accustomed to my Sage pack, which had a roll-top brain pouch (just another of the many things I loved about the Sage), which protected everything in it from the rain. This leads me to the next con.
(2) It is not rain-safe…. at all.
The contents of the brain pouch were safe from misting only, not full-on rain. Items located in this pouch often got wet, which is not ideal.
The risk of moisture required you to leave extra space in the main compartment of your pack for rainy days, or to keep all clothing and electronics in the main compartment of your pack. This made packing more challenging, as the items I would normally have access to now had to be buried away.
Not only was the brain pouch susceptible to soaking, but so was the main compartment. In fact, I promoted my trash-compacter bag liner from precautionary to essential and kept an extra one with me. A rip in the trash bag would mean everything would get wet.
(3) It hurt
I know I said the shoulder straps were so comfortable.. and that’s true, but the hip belt far outweighed that joy.
In store, this pack felt extremely comfortable, so I was very surprised at how thing’s turned out.
I had noticed that it was not a “woman’s pack”, but I had believed that the idea of a woman’s pack was just a marketing strategy.
Let me be clear. It’s not.
There are stories of women who can use men’s packs, but apparently, I am not one of them.
After just the first 8 miles on trail, my hips were aching.
The hip belt was not a good fit, and it was crushing my hip bones. The fact that I had little fat remaining on my hips at this point on the trail may have contributed to the poor fit, but regardless of the reason, I found it impossible to hike with.
After just a few days, my hips were bruised (and it felt worse than it looked). Putting my pack on in the morning made me cringe.
*One of the differences between a men’s and women’s pack is that the hip belt is more curved in a women’s pack. Women’s packs typically have shorter, narrower shoulder straps, a shorter torso, and sometimes even a smaller carrying capacity. The hip belt was the only factor that impacted my experience, but it was enough for me to recommend women’s packs for women from now on.*
With that said, I would still recommend this pack – just not for women!
(4) Internal water reservoir
I ordered a new pack and had it delivered to Shelter Cove Resort, although I wish I had gotten my act together and ordered one sooner because I was in rough shape by the time I reached Shelter Cove.
I would like to note that this was just my experience with a pack that was not ideal for my body, and I still love Gregory packs!
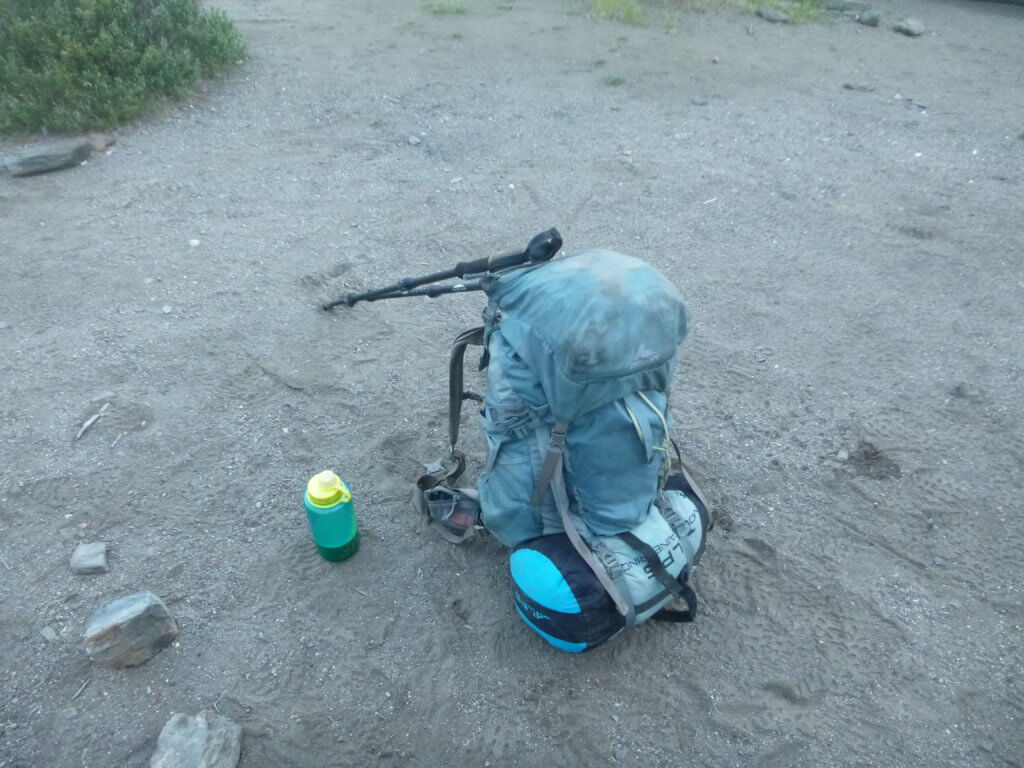
3. ULA Circuit 68 L Pack
Stats
- # of miles used: 697.4
- Weight: 2.69 lbs (size xtra small hip belt)
- Size: 68 L capacity
- Price at purchase:$271.30 USD
At Shelter Cove (mile 1906.6), I began utilizing a ULA Circuit.
Pros
(1) Huge carrying capacity
The carrying capacity of this bag was insane! I did not need such a large capacity at this point of the trail, but I saw it being ideal for use on future trails with sections similar to the Sierra.
The main pouch was huge, and it closed with a roll-top. This helped with keeping rain out, and eliminated the risk of a zipper breaking.
(2) Top compression strap
There is a top compression strap that comes from the back of the pack and crosses over the roll-top to click into its buckle at the front.
When you are not carrying a lot, this can be just used to keep your pack from unnecessary movement, but when you have more to carry (or just want something more accessible), it can be used to hold a larger piece of gear in place; such as a foam mattress or a bear canister.
*Personally, I prefer the straps underneath (like the Sage), but this is a decent alternative.
(3) Side compression straps
The side compression straps could also be used to hold gear in place, such as tent poles. It was also useful for clipping items onto (like a Kula cloth!).
(4) Large front pouch (with shock cords!)
The large front pouch had such a large capacity! It also had shock cords, which were useful for holding a jacket or other layers you may want nearby in changing conditions (it’s easier than digging out your raincoat while it’s already raining).
The pack was common among thru-hikers and had come highly recommended from all those I encountered on the trail. Seeing as how it was so late in the hiking season, most people were able to determine the strengths and weaknesses of gear throughout a variety of PCT terrains.
I had a bit of a different experience with the Circuit.
Cons
(1) Internal water reservoir
I know I’ve mentioned this twice already, but it’s not ideal. Let me know if you feel differently!
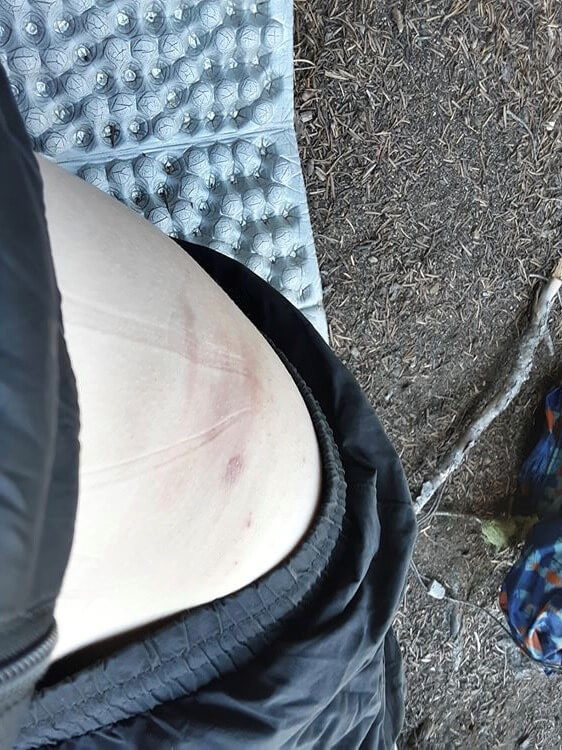
(2) It hurt
Are you noticing a trend here? Unfortunately, I noticed it too.
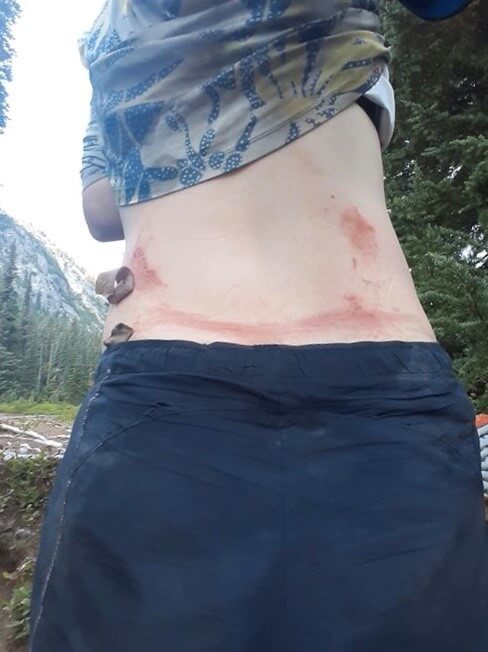
The ULA Circuit rubbed dreadfully against my body and created open wounds (seen in the image to the left – they almost look like a smiley face, which is ironic).
Adding salt to the wound – *literal salt* – made it worse. My sweat irritated the region, but there was no avoiding it.
Even a double zero in Cascade Locks did not allow for enough time to heal in any significant way. By the time I got to Steven’s Pass, WA, the wounds were bloody and deep (I wish I took pictures of them at their worst).
I covered them in some KT tape, generously given to me by Ninja Turtle, and that allowed me to get to Mazama. From there, new tape got me to the border, but it took a while yet to completely dry up those wounds.
Even the summer after completing the trail, I still had marks on my back, hips, and butt. (The scars were gone after ~1.5 years)
I think it’s important to note that no one else I met who carried a ULA Circuit had the same issues as I did.
For me, the pack pinched in the area where the hip belt met the main body of the pack, removing my skin and causing me to bleed (no matter how much I adjusted the pack).
Everyone else I encountered who had this pack had glowing reviews. My experience should not necessarily deter you from giving this pack a shot. After all, I did enjoy the set-up of the pack and, functionally, it was great. With that said, it’s good to hear other experiences when making your decision.
*Update after the Long Trail & Tahoe Rim Trail
I took this trail with me on the Long Trail (LT) during the summer of 2022 and Tahoe Rim Trail (TRT) in 2023. The pack got the job done, but I am still looking to upgrade down the road. However, the Circuit has held up. Nothing has broken on the pack and it has proven to be very durable and adaptable to completely different trails.
I was able to test it out with a bear can and extra weight (like microspikes), and while it was a bit of a puzzle to sort out a home for every item, it was possible.
Finding the right backpack takes time and experience. Knowing what you want is half the battle!
Hopefully, these stats, pros, cons, and the practicalities of certain pack features help guide you in your decision-making process!
If you have any questions, feel free to comment below or reach out on Instagram @advanture.vet.


